 handbasket")
|
Helena Observatory, Tupperville, NS |

|
|
| ||
Helena Observatory Blog: 2016 | ||
| 10-Jul-2026 17:33 ADT | 10-Jul-2026 20:33 UTC | |
|
| ||
|
|
Helena Observatory, Tupperville, NS |
|
|
| ||
Helena Observatory Blog: 2016 | ||
| 10-Jul-2026 17:33 ADT | 10-Jul-2026 20:33 UTC | |
|
| ||
| 07-Jun-2016 |
I am making progress on the new control unit. It consists of several "blcak boxes". The shutter controller, which sequences the shutter doors, has been operational since last year. However, up until now, I have been operating it by manually connecting power via a polarity-reversing plug. Last week, I completed the motor control unit, which is responsible for starting and stopping the dome rotation motor and changing its direction. It also operates the shutter controller, which, from the perspective of the motor controller, looks just like a simple reversible motor. A tethered handheld remote control unit allows me to control the shutters or the dome rotation manually. Of course, the intention is to have the computer do the operating. The interface to the computer is the function of the main control unit, which I have completed testing today. I actually did most of the construction of the main controller last year, prior to moving the observatory. However, I wasn't able to do any testing until last fall, at which time it failed the all-imortant "smoke test"! I had to do some major revisions, which included separating the motor control functions into a separate box. The testing I completed today included making sure that each subsystem in the control unit operates its relays correctly on command from the computer. The next step is to wire up the control unit, connecting it to the motor control unit and to the network wiring in the observatory. Then will come some integration testing, making sure that not only the realys, but the motors themselves operate correctly under manual computer control. The final step will be to test the driver software and the observatory control software that, together, will operate the dome. The software is mostly written, but is untested because, up until now, there was no hardware for it to operate. I have been refamiliarizing myself with the software and tweaking it as much as I could without hardware. So, unless I get another major interruption, I should be able to get the whole project finished in a few weeks. I already have an excellent dome synchronization program to link the telescope mount and the dome rotation function. So, with the software working, my observatory will be fully operational again. This time, it will be with a system that is technically much simpler than what I had before, and therefore more reliable. |
| 25-Apr-2016 |

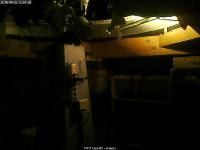
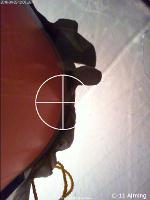
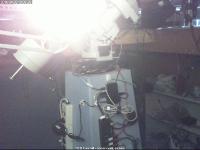
The observatory is still not fully operational. It is only now getting warm enough to spend time out there working on it. I have started assembling revision 2 of the dome control hardware. Meanwhile, the observatory is operational with manual dome control. I did some planetary astrophotography last month, catching a couple of decent images of Jupiter near opposition. Mars and Saturn are coming around soon, so I am ready for them. Last night, I did my first deep sky astrophotography in a year. I have had this idea in mind of a rig that will give me a better image scale for tiny objects like planetary nebulae and distant galaxies: using the C-11 as an imaging scope with the C-90 piggybacked on it as a guide scope. It is a bit of a 'franken-rig', but, amazingly, it worked quite well! I have included a photo of the rig with this post. The result of last night's image run, while confirming the concept, needs more work before posting. If it cleans up well enough, I will post it to my astrophotography gallery. As part of the 'clean up' of the image, I need to take calibration frames known as 'darks' and 'flats'. Flats need a carefully controlled lighting setup in order to properly calibrate the images. The other photos in this post show the setup I use for taking lights. I shine a light onto a featureless part of the dome and, with a white T-shirt stretched over the aperture of the scope, take several images. The view from webcam #2 shows the desk lamp on a parallelogram mount shining up at the dome. Cam #3 is a view from the side of the scope (You can see this cam in the first photo.), showing the illuminated interior of the dome. You can see the folds of the T-shirt fabric and the rope holding it silhouetted against the dome. Cam #4 is located directly below the part of the dome being illuminated, so it is getting blinded by the light. |
Copyright © 2019 by Kathleen Walker
Last modified: 04-Feb-2019